Google Chrome is a web browser, most used widely in the world. It is fast, simple, and easy to use and secure browser built for the modern web.
Neither Google Chrome comes with Ubuntu default, nor included in the Ubuntu repositories. But here, I am telling about another open-source web browser. It is available in the default Ubuntu repositories.
If you don’t want to install chromium and looking only for chrome, this article will help you.
I don’t want to waste your more time, so I come to straight on the point how to install chrome in Ubuntu 20.04. you can do by following steps
Step 1: Download Chrome
Step 2: Install chrome in Ubuntu by using dpkg utility.
Step 3: Install chrome in Ubuntu by using GUI
Step 4: Starting chrome and Set as the default browser in Ubuntu 20.04
Step 1: Download Chrome
#1 Open Google Chrome official website. Click on Download Chrome.

When, You click on Download Chrome, It will detect automatic, which type of package, you are looking. It will prompt download file compatible with operating system, you are using.
For Example, If you are using windows then this website will server you .exe file. and If you are using Linux, I will show available files for Linux. There is two files .deb and .rpm Download .deb files.
#2 Select package type and Click on Accept and Download.

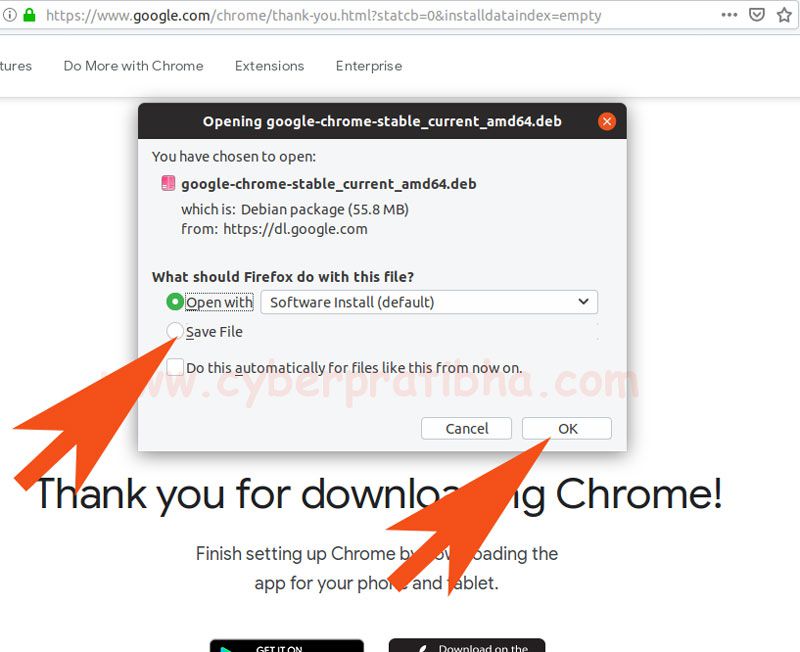
#3 Next window will be prompt, Select save file and Click on OK
If you want, installation will become automatic after download complete. Leave it default and click on OK for next process.
Step 2: Install chrome in Ubuntu by using dpkg utility.
Step 3: Install chrome in Ubuntu by using GUI
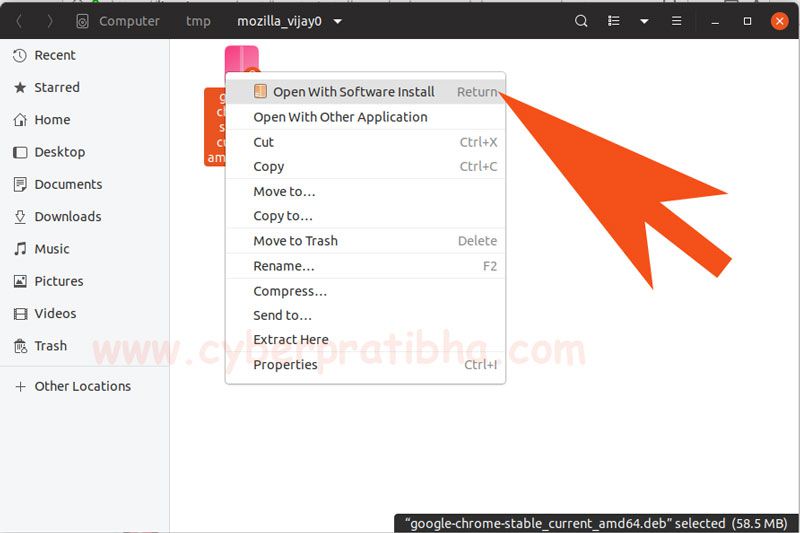
#1 Open downloaded file,

#2 Right click on downloaded file and left click on “Open With Software Install”
#3 Click on Install

#4 If you are logged in with root user, Installation will start automatic. But in case of sudo user, It will ask for authentication. Give the password and click on Authenticate.

The installation will start automatic and after some time you will see Google Chrome has been installed.
Step 4: Starting chrome and Set as the default browser in Ubuntu 20.04
Click on application checker board on left lower corner, and search google chrome in search box.
Chrome will be appear on the screen Double click on it to start.

When the first time you start google chrome it will ask for making default browser to check both option and and click on OK

Now, Google chrome in Ubuntu. Enjoy

If you are facing problem to install something else, Please write in comment box. I will write an article on same.
How to install google chrome in Ubuntu 20.04 Video in Hindi
If you want to get in touch write [email protected]
Cheers