
Hey, Welcome again on my blog, this article is the part of wordpress website series. In this article you will learn importance of dns nameserver and configuration.
The importance of DNS nameserver?
Without configuring of DNS nameserver configuration your website will not work. means your site will not we live or your website URL will not be accessed. when you will make this change, your website starts working worldwide. In the last article buy domain and webspace for website how you can buy website name and web space. When you buy hosting service you will get a mail from your hosting provider, with FTP and nameserver detail.

How to change DNS nameserver configuration on Bigrock.com?
As you now I am user of bigrock.com so I have good experience with it, Here I am telling steps to add domain nameserver for newly buy website.
Step1: You will get a mail with dns server like
Name Server 1: ns2.md-in-4.webhostbox.net
Name Server 2: ns1.md-in-4.webhostbox.net
Step 2: Go on bigrock.com and login with your credential, After login you will find, list/search order in Manage orders menu. Click on Domain name which do you want to configure.

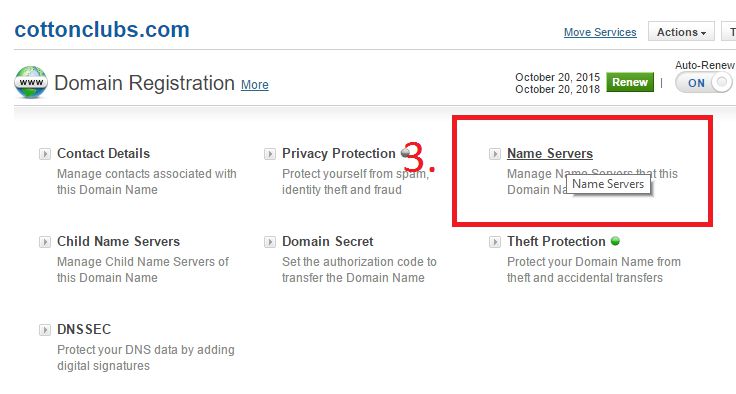
Step 3: After click on website name new window will be come, and you will find name servers hyper-link click on it.
Step 4: New window will be popup Enter the dns nameservers detail what you received by mail and click on update name Servers

One thought on “4 Steps to DNS nameserver configuration for new website”